Salta al contenuto principale

Acer Chromebook C740 Trackpad Replacement

Cosa ti serve

  1. Acer Chromebook C740 Trackpad Replacement, Back Panel: passo 1, immagine 1 di 1
    • Power down the Chromebook and disconnect the power adapter.

  2. Acer Chromebook C740 Trackpad Replacement: passo 2, immagine 1 di 2 Acer Chromebook C740 Trackpad Replacement: passo 2, immagine 2 di 2
    • Place the chromebook bottom side up on a flat surface.

    • Remove the thirteen 7 mm screws with a Phillips #0 screwdriver.

  3. Acer Chromebook C740 Trackpad Replacement: passo 3, immagine 1 di 3 Acer Chromebook C740 Trackpad Replacement: passo 3, immagine 2 di 3 Acer Chromebook C740 Trackpad Replacement: passo 3, immagine 3 di 3
    • Insert the plastic opening tool into the slit near the hinges and pry upwards to lift the back panel.

    • Applying pressure may be necessary. A click indicates the panel is ready to come off.

  4. Acer Chromebook C740 Trackpad Replacement, Battery: passo 4, immagine 1 di 3 Acer Chromebook C740 Trackpad Replacement, Battery: passo 4, immagine 2 di 3 Acer Chromebook C740 Trackpad Replacement, Battery: passo 4, immagine 3 di 3
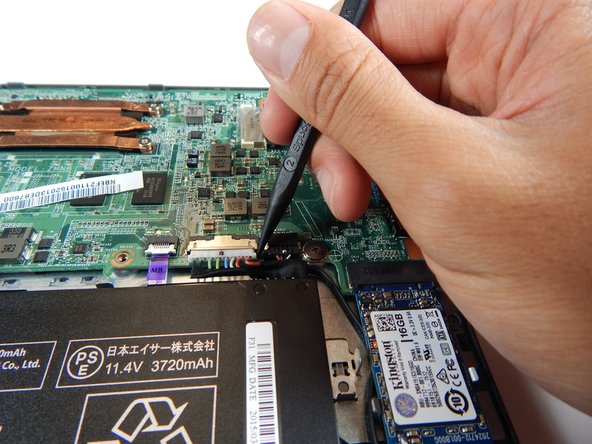
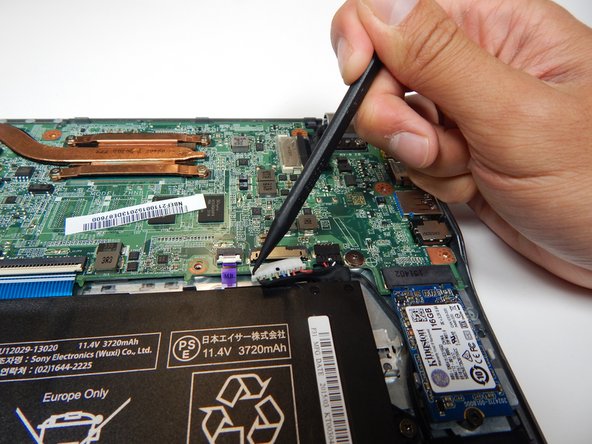
    • Unplug the white 8-wire battery connector from the motherboard by using a spudger to push the two L-shaped indentations towards the battery.

    • The connector is a tight fit. This process requires going back-and-forth between the two indentations and plenty of patience.

  5. Acer Chromebook C740 Trackpad Replacement: passo 5, immagine 1 di 2 Acer Chromebook C740 Trackpad Replacement: passo 5, immagine 2 di 2
    • Remove the the two 3.7 mm screws with a Phillips #0 screwdriver.

  6. Acer Chromebook C740 Trackpad Replacement: passo 6, immagine 1 di 1
    • Lift the battery from the frame.

  7. Acer Chromebook C740 Trackpad Replacement, Trackpad: passo 7, immagine 1 di 3 Acer Chromebook C740 Trackpad Replacement, Trackpad: passo 7, immagine 2 di 3 Acer Chromebook C740 Trackpad Replacement, Trackpad: passo 7, immagine 3 di 3
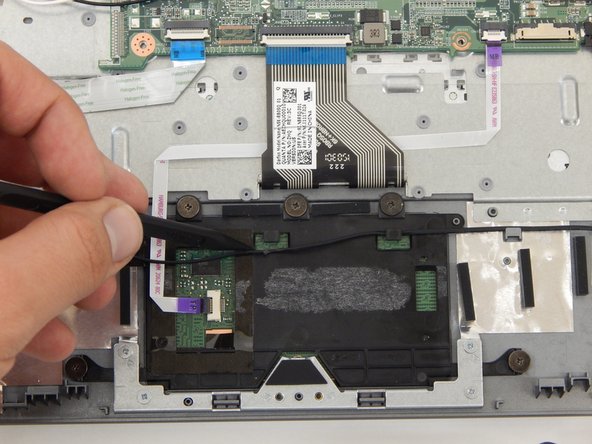
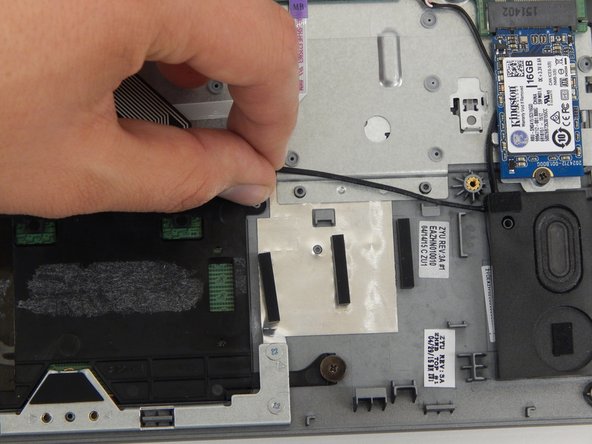
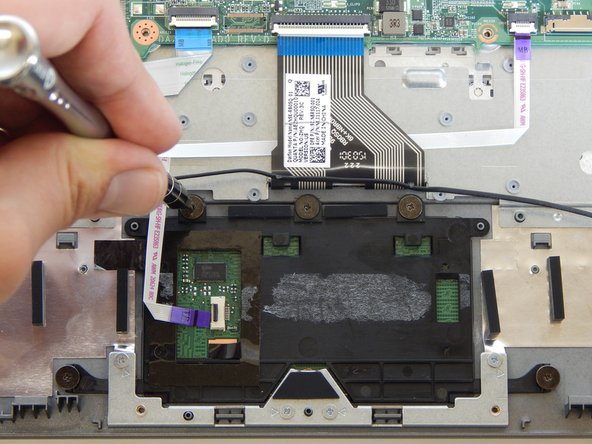
    • Pull the black wire out from under the the black center clips and up from the gray outer clips with a spudger.

  8. Acer Chromebook C740 Trackpad Replacement: passo 8, immagine 1 di 2 Acer Chromebook C740 Trackpad Replacement: passo 8, immagine 2 di 2
    • Use a spudger to lift the black clip on the small purple ribbon cable connector to the left of the touchpad.

    • Pull the ribbon cable out from the connector.

  9. Acer Chromebook C740 Trackpad Replacement: passo 9, immagine 1 di 2 Acer Chromebook C740 Trackpad Replacement: passo 9, immagine 2 di 2
    • Remove the five 2.5 mm screws with a Phillips #0 screwdriver.

  10. Acer Chromebook C740 Trackpad Replacement: passo 10, immagine 1 di 2 Acer Chromebook C740 Trackpad Replacement: passo 10, immagine 2 di 2
    • Remove the four 2.8 mm screws with a Phillips #00 screwdriver.

  11. Acer Chromebook C740 Trackpad Replacement: passo 11, immagine 1 di 2 Acer Chromebook C740 Trackpad Replacement: passo 11, immagine 2 di 2
    • Wiggle off the silver bracket with your fingers.

  12. Acer Chromebook C740 Trackpad Replacement: passo 12, immagine 1 di 2 Acer Chromebook C740 Trackpad Replacement: passo 12, immagine 2 di 2
    • Remove the black tape on the left side of the touchpad.

  13. Acer Chromebook C740 Trackpad Replacement: passo 13, immagine 1 di 2 Acer Chromebook C740 Trackpad Replacement: passo 13, immagine 2 di 2
    • Lift off the black plastic cover with the plastic opening tool.

Conclusione

To reassemble your device, follow these instructions in reverse order.

Altre 6 persone hanno completato questa guida.

Team

Cal Poly, Team S22-G2, Livingston Spring 2017 Membro di Cal Poly, Team S22-G2, Livingston Spring 2017

CPSU-LIVINGSTON-S17S22G2

4 Membri

12 Guide realizzate

0 Commenti

Aggiungi Commento

Visualizza Statistiche:

Ultime 24 Ore: 0

Ultimi 7 Giorni: 0

Ultimi 30 Giorni: 14

Tutti i Tempi: 2,537