Salta al contenuto principale

Acer Chromebook 15 CB5-571-C09S Solid State Drive Replacement

Cosa ti serve

  1. Acer Chromebook 15 CB5-571-C09S Solid State Drive Replacement, Back Cover: passo 1, immagine 1 di 1
    • Place the device on a flat surface faced down so that the fan vents are at the top of the device.

  2. Acer Chromebook 15 CB5-571-C09S Solid State Drive Replacement: passo 2, immagine 1 di 2 Acer Chromebook 15 CB5-571-C09S Solid State Drive Replacement: passo 2, immagine 2 di 2
    • Unscrew the eighteen 6 mm PH0 Phillips head screws from the back of the device.

  3. Acer Chromebook 15 CB5-571-C09S Solid State Drive Replacement: passo 3, immagine 1 di 2 Acer Chromebook 15 CB5-571-C09S Solid State Drive Replacement: passo 3, immagine 2 di 2
    • Use a plastic opening tool to pry open the back cover around the edges of the device.

    • Be careful not to crack or break the back cover of the device.

    • You will have to adjust the position of the device to pry it open along all the edges.

  4. Acer Chromebook 15 CB5-571-C09S Solid State Drive Replacement: passo 4, immagine 1 di 2 Acer Chromebook 15 CB5-571-C09S Solid State Drive Replacement: passo 4, immagine 2 di 2
    • Stand the device up with the hinges on top and carefully pull apart the back cover from the device.

  5. Acer Chromebook 15 CB5-571-C09S Solid State Drive Replacement, Solid State Drive: passo 5, immagine 1 di 3 Acer Chromebook 15 CB5-571-C09S Solid State Drive Replacement, Solid State Drive: passo 5, immagine 2 di 3 Acer Chromebook 15 CB5-571-C09S Solid State Drive Replacement, Solid State Drive: passo 5, immagine 3 di 3
    • The Solid State Drive is the blue chip locate right beneath the fan.

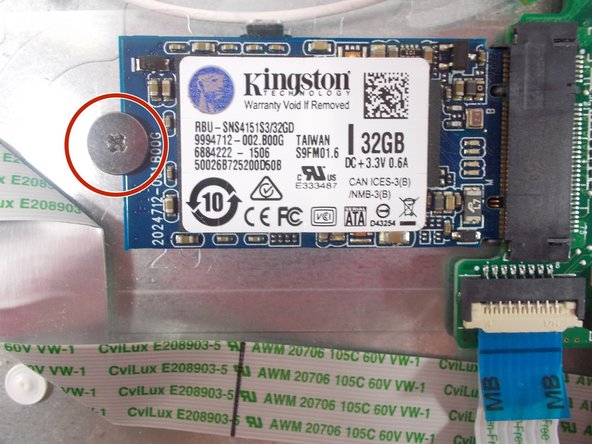
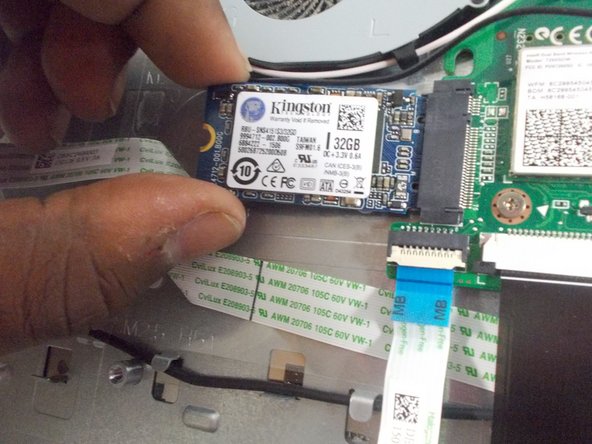
    • Unscrew the 3 mm PH00 Phillips head screw located on the left side of the SSD.

  6. Acer Chromebook 15 CB5-571-C09S Solid State Drive Replacement: passo 6, immagine 1 di 2 Acer Chromebook 15 CB5-571-C09S Solid State Drive Replacement: passo 6, immagine 2 di 2
    • Grab the top and bottom edges of the SSD and carefully pull it out from the motherboard.

Conclusione

To reassemble your device, follow these instructions in reverse order.

Altre 5 persone hanno completato questa guida.

Team

Un commento

Mine has a positive and neutral wire moving away from the SSD, and removing the chip entirely hasn't impeded operation whatsoever despite me doing it to force developer mode.

Helios Bajammin - Replica

Aggiungi Commento

Visualizza Statistiche:

Ultime 24 Ore: 0

Ultimi 7 Giorni: 11

Ultimi 30 Giorni: 34

Tutti i Tempi: 3,248