Questa versione può contenere modifiche errate. Passa all'ultima istantanea verificata.
Cosa ti serve
-
Questo passaggio è privo di traduzione. Aiuta a tradurlo
-
Use a Phillips #0 screwdriver to unscrew the eight 4mm screws.
-
Use a Phillips #0 screwdriver to unscrew the two 7mm screws.
-
Remove the cover of the device by prying up from one of the edges with a spudger or plastic opening tool.
-
-
Questo passaggio è privo di traduzione. Aiuta a tradurlo
-
Use a spudger to disconnect the battery's connector from the motherboard. The connector should slide out toward the battery.
-
-
Questo passaggio è privo di traduzione. Aiuta a tradurlo
-
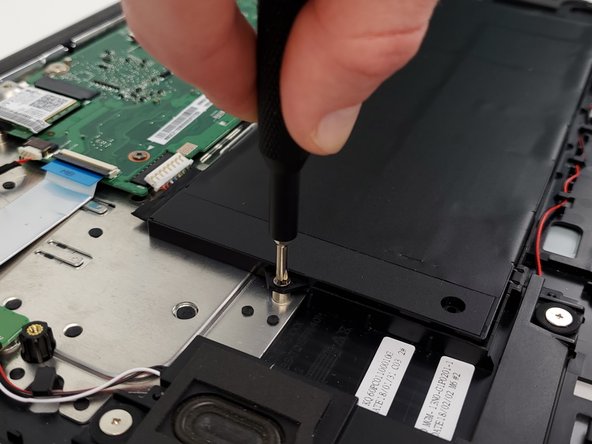
Use a Phillips #0 screwdriver to unscrew the two 5.5mm screws from the battery housing.
-
-
-
Questo passaggio è privo di traduzione. Aiuta a tradurlo
-
While lifting the connector side of the battery, slide the battery towards the center of the laptop.
-
Remove the battery from the laptop.
-
-
Questo passaggio è privo di traduzione. Aiuta a tradurlo
-
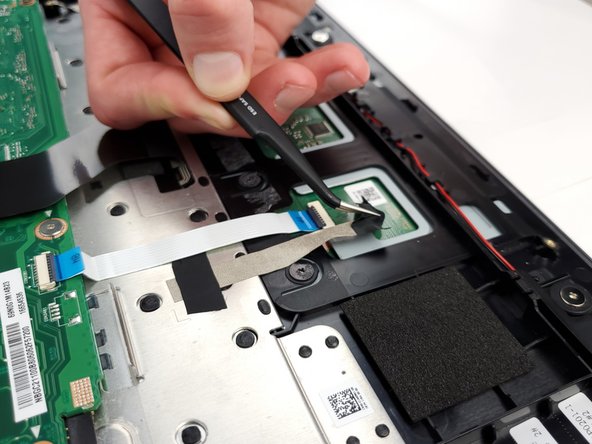
Use tweezers to set aside the electric tape (black) and the ground tape (tan) to reveal the trackpad screws and ribbon connector.
-
-
Questo passaggio è privo di traduzione. Aiuta a tradurlo
-
Use a spudger to disconnect the connector that connects the trackpad to the motherboard. Once the locking tab of the ZIF connector is flipped up, the ribbon cable should slide out toward the motherboard.
-
-
Questo passaggio è privo di traduzione. Aiuta a tradurlo
-
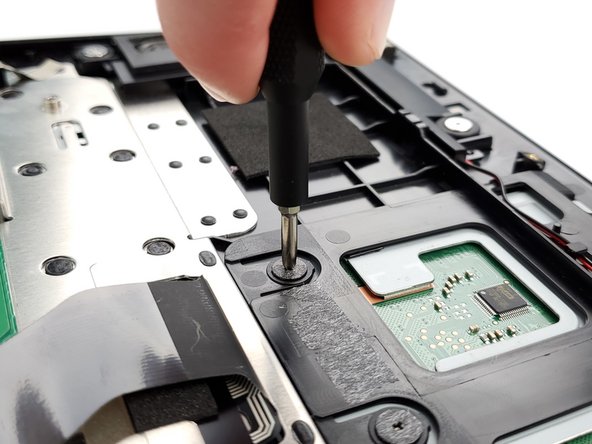
Use a Phillips #0 screwdriver to unscrew the three 2mm screws from the top of the trackpad.
-
-
Questo passaggio è privo di traduzione. Aiuta a tradurlo
-
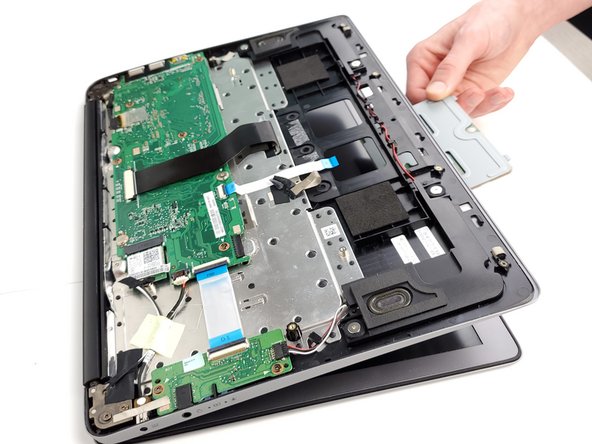
Remove the trackpad out from its housing by first sliding it towards the keyboard and then down towards the screen.
-


Annulla: non ho completato questa guida.
Altre 2 persone hanno completato questa guida.
Team

Embry-Riddle Aeronautical University, Team S17-G7, Lamothe Spring 2020 Membro di Embry-Riddle Aeronautical University, Team S17-G7, Lamothe Spring 2020
ERAU-LAMOTHE-S20S17G7
3 Membri
5 Guide realizzate
Un commento
Thanks for this guide. You have helped a non-techie look oh so impressive with his repair skills!