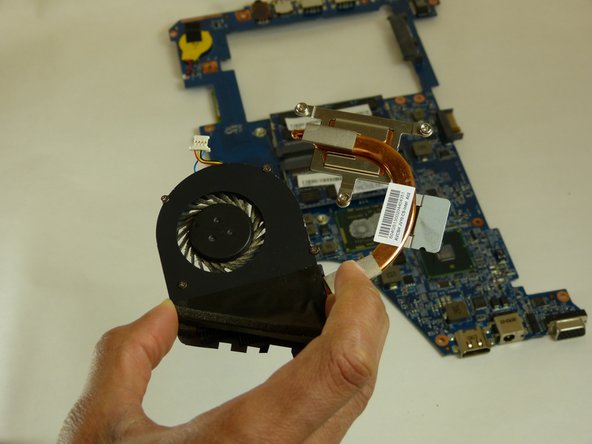
Salta al contenuto principale

Acer Aspire TimelineX 1830T-68U118 Fan Replacement

Cosa ti serve

  1. Acer Aspire TimelineX 1830T-68U118 Fan Replacement, Battery: passo 1, immagine 1 di 1
    • Turn your laptop over, and find the laptop battery release button locks for your Acer laptop.

  2. Acer Aspire TimelineX 1830T-68U118 Fan Replacement: passo 2, immagine 1 di 3 Acer Aspire TimelineX 1830T-68U118 Fan Replacement: passo 2, immagine 2 di 3 Acer Aspire TimelineX 1830T-68U118 Fan Replacement: passo 2, immagine 3 di 3
    • Hold the battery release button, and pull the battery out of the laptop.

  3. Acer Aspire TimelineX 1830T-68U118 Fan Replacement, Fan: passo 3, immagine 1 di 3 Acer Aspire TimelineX 1830T-68U118 Fan Replacement, Fan: passo 3, immagine 2 di 3 Acer Aspire TimelineX 1830T-68U118 Fan Replacement, Fan: passo 3, immagine 3 di 3
    • Remove battery before beginning.

    • Use a Phillips #0 screwdriver to remove the 5 screws from the bottom cover.

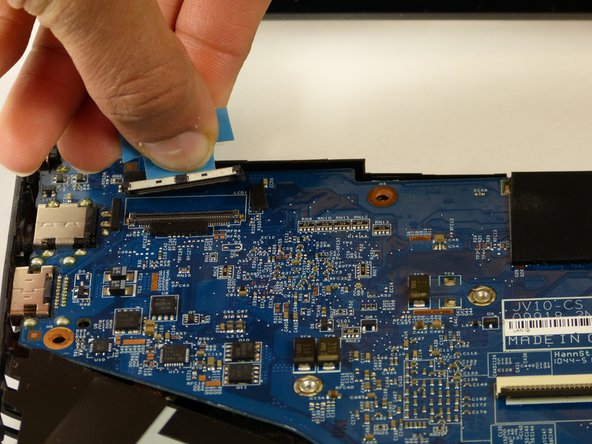
    • Pry open the cover using the Spudger tool.

  4. Acer Aspire TimelineX 1830T-68U118 Fan Replacement: passo 4, immagine 1 di 3 Acer Aspire TimelineX 1830T-68U118 Fan Replacement: passo 4, immagine 2 di 3 Acer Aspire TimelineX 1830T-68U118 Fan Replacement: passo 4, immagine 3 di 3
    • Remove the keyboard with a plastic opening tool or spudger.

    • There is a plastic film that needs to be gently peeled from the laptop base.

    • Use caution when removing the keyboard as it is fragile.

  5. Acer Aspire TimelineX 1830T-68U118 Fan Replacement: passo 5, immagine 1 di 2 Acer Aspire TimelineX 1830T-68U118 Fan Replacement: passo 5, immagine 2 di 2
    • Use a Phillips #0 screwdriver to remove the 4 screws from the motherboard shield.

  6. Acer Aspire TimelineX 1830T-68U118 Fan Replacement: passo 6, immagine 1 di 2 Acer Aspire TimelineX 1830T-68U118 Fan Replacement: passo 6, immagine 2 di 2
    • Remove the motherboard from the base of the laptop by unscrew the screw drivers using PH0 mm Phillips Head.

    • Carefully remove the charger attachment in the top left.

  7. Acer Aspire TimelineX 1830T-68U118 Fan Replacement: passo 7, immagine 1 di 3 Acer Aspire TimelineX 1830T-68U118 Fan Replacement: passo 7, immagine 2 di 3 Acer Aspire TimelineX 1830T-68U118 Fan Replacement: passo 7, immagine 3 di 3
    • Carefully remove the fan from the motherboard by detaching the plastic insert as seen in the pictures

Conclusione

To reassemble your device, follow these instructions in reverse order.

0 Commenti

Aggiungi Commento

Visualizza Statistiche:

Ultime 24 Ore: 0

Ultimi 7 Giorni: 1

Ultimi 30 Giorni: 14

Tutti i Tempi: 1,229