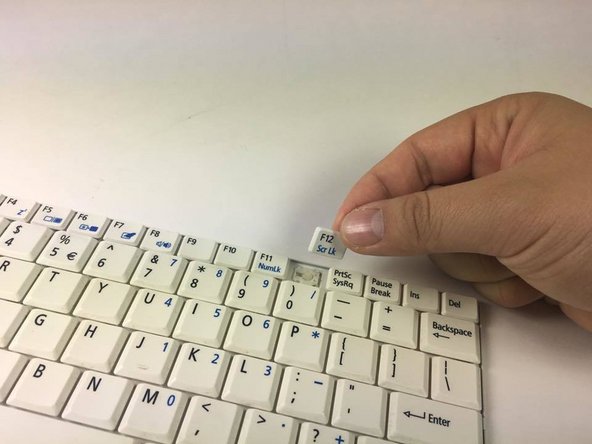
Salta al contenuto principale

Acer Aspire One A150-1672 Individual Key Replacement

Cosa ti serve

  1. Acer Aspire One A150-1672 Individual Key Replacement, Individual Key: passo 1, immagine 1 di 2 Acer Aspire One A150-1672 Individual Key Replacement, Individual Key: passo 1, immagine 2 di 2
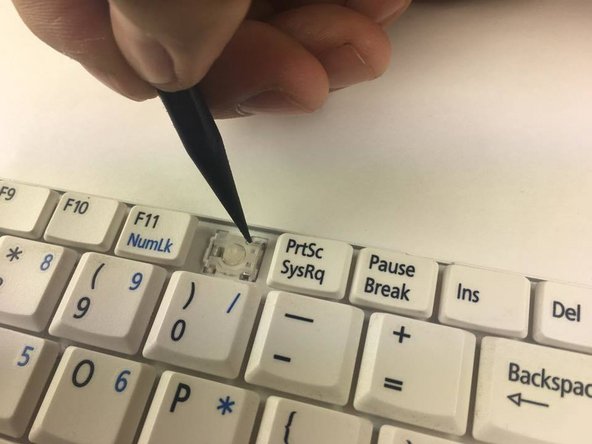
    • To remove the keyboard, place the Blue Plastic Opening Tool at the 3 indentations above the keyboard as shown.

    • Slip the Blue Plastic Opening Tool in the space between the keyboard and the pink plastic casing and push down.

    • Pushing down on all 3 indentations should cause the keyboard to pop upwards slightly.

  2. Acer Aspire One A150-1672 Individual Key Replacement: passo 2, immagine 1 di 2 Acer Aspire One A150-1672 Individual Key Replacement: passo 2, immagine 2 di 2
    • There is a notch on the right side of the casing that blocks the keyboards ability to be removed.

    • Use the Blue Plastic opening tool and your fingers to pull up the top part of the keyboard as shown.

    • Use the Blue Plastic Opening Tool to separate the right side of the casing from the keyboard as shown.

    • After you have successfully moved the keyboard out from under the notch, pull the keyboard up.

  3. Acer Aspire One A150-1672 Individual Key Replacement: passo 3, immagine 1 di 1
    • Using the Blue Plastic Opening Tool, pull up on the keyboard connector to completely detach the keyboard from the base of the laptop.

  4. Acer Aspire One A150-1672 Individual Key Replacement: passo 4, immagine 1 di 2 Acer Aspire One A150-1672 Individual Key Replacement: passo 4, immagine 2 di 2
    • Using the Blue Plastic Opening Tool, remove the white plastic piece of your desired key.

    • Place the Blue Plastic Opening Tool on the right side of the individual key, then gently pull up to detach the clips underneath.

    • Remove the key from the hinges by sliding the key to the left.

  5. Acer Aspire One A150-1672 Individual Key Replacement: passo 5, immagine 1 di 2 Acer Aspire One A150-1672 Individual Key Replacement: passo 5, immagine 2 di 2
    • Two ends need to be unhooked. They are located at the top and bottom of the key on the right side.

    • Using the Spudger, push the small, clear-colored end of the hinge out of the hook.

  6. Acer Aspire One A150-1672 Individual Key Replacement: passo 6, immagine 1 di 2 Acer Aspire One A150-1672 Individual Key Replacement: passo 6, immagine 2 di 2
    • Using the Blue Plastic Opening Tool, push the plastic hinge to the left to detach the hinge after the ends on the right are detached.

    • Remove the plastic hinge by pulling the plastic hinge upwards.

Conclusione

To reassemble your device, follow these instructions in reverse order.

Vivianna

Membro da: 10/30/16

101 Reputazione

1 Guida realizzata

Team

Baylor, Team 4-3, Williams Fall 2016 Membro di Baylor, Team 4-3, Williams Fall 2016

BU-WILLIAMS-F16S4G3

3 Membri

8 Guide realizzate

0 Commenti

Aggiungi Commento

Visualizza Statistiche:

Ultime 24 Ore: 0

Ultimi 7 Giorni: 0

Ultimi 30 Giorni: 8

Tutti i Tempi: 247