Salta al contenuto principale

Acer Aspire One 532h-2806 Screen Replacement

Cosa ti serve

  1. Acer Aspire One 532h-2806 Screen Replacement, Screen: passo 1, immagine 1 di 2 Acer Aspire One 532h-2806 Screen Replacement, Screen: passo 1, immagine 2 di 2
    • Turn the device off before beginning any replacements.

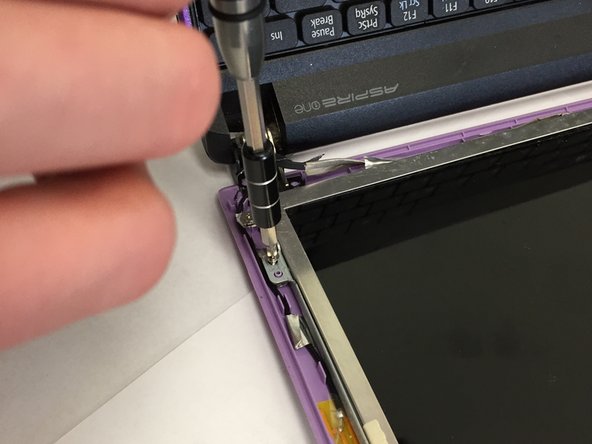
    • Locate the two circular black stickers at the bottom corners of the laptop screen.

    • Remove the stickers.

    • Two 6mm Phillips Screws should now be visible.

  2. Acer Aspire One 532h-2806 Screen Replacement: passo 2, immagine 1 di 2 Acer Aspire One 532h-2806 Screen Replacement: passo 2, immagine 2 di 2
    • Use a Phillips #0 Screwdriver to remove the two 6mm screws from the screen.

  3. Acer Aspire One 532h-2806 Screen Replacement: passo 3, immagine 1 di 2 Acer Aspire One 532h-2806 Screen Replacement: passo 3, immagine 2 di 2
    • Using the opener tool, remove the plastic cover, surrounding the screen.

    • It is normal to hear clicking sounds as the plastic cover is removed.

  4. Acer Aspire One 532h-2806 Screen Replacement: passo 4, immagine 1 di 3 Acer Aspire One 532h-2806 Screen Replacement: passo 4, immagine 2 di 3 Acer Aspire One 532h-2806 Screen Replacement: passo 4, immagine 3 di 3
    • Remove the four 6mm Phillips screws surrounding the screen.

    • These are holding the screen in place. After the screws are removed, the screen should remove itself from the plastic outer cover.

  5. Acer Aspire One 532h-2806 Screen Replacement: passo 5, immagine 1 di 1
    • Peel back the fuss cable from the outer laptop plastic cover.

    • Be careful, not to yank or rip the cable, it should gently peel back.

  6. Acer Aspire One 532h-2806 Screen Replacement: passo 6, immagine 1 di 1
    • Locate the ZIF (zero insertion force) Cable.

    • Peel back any tape if necessary

    • Carefully unplug it.

    • Do not pull hard, it should remove itself easily.

  7. Acer Aspire One 532h-2806 Screen Replacement: passo 7, immagine 1 di 2 Acer Aspire One 532h-2806 Screen Replacement: passo 7, immagine 2 di 2
    • Remove the two 6mm screws on each side of the screen with a Phillips #0 screwdriver.

  8. Acer Aspire One 532h-2806 Screen Replacement: passo 8, immagine 1 di 3 Acer Aspire One 532h-2806 Screen Replacement: passo 8, immagine 2 di 3 Acer Aspire One 532h-2806 Screen Replacement: passo 8, immagine 3 di 3
    • Remove the screen.

Conclusione

To reassemble your device, follow these instructions in reverse order.

Altre 2 persone hanno completato questa guida.

0 Commenti

Aggiungi Commento

Visualizza Statistiche:

Ultime 24 Ore: 1

Ultimi 7 Giorni: 2

Ultimi 30 Giorni: 5

Tutti i Tempi: 299