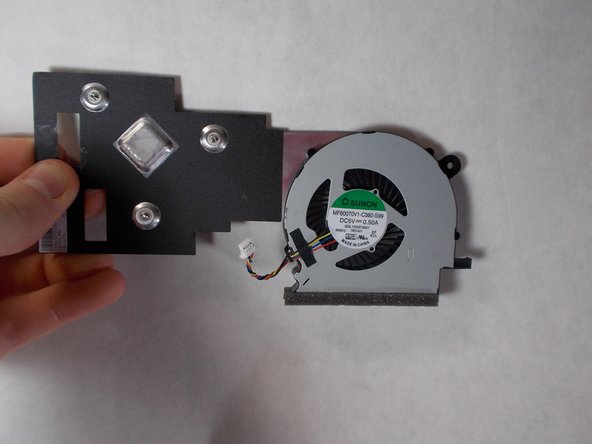
Salta al contenuto principale

Acer Aspire ES1-512-C80E Fan Replacement

Cosa ti serve

  1. Acer Aspire ES1-512-C80E Fan Replacement, Back Cover: passo 1, immagine 1 di 1
    • Place the device upside down on a flat surface.

    • Using a Phillips #00 screwdriver, remove all nineteen 1.2mm screws that secure the bottom cover of the device.

  2. Acer Aspire ES1-512-C80E Fan Replacement: passo 2, immagine 1 di 3 Acer Aspire ES1-512-C80E Fan Replacement: passo 2, immagine 2 di 3 Acer Aspire ES1-512-C80E Fan Replacement: passo 2, immagine 3 di 3
    • Pry around the edges with a spudger to remove the back cover.

    • The two hinges on the back require additional force to be popped open.

  3. Acer Aspire ES1-512-C80E Fan Replacement, Keyboard: passo 3, immagine 1 di 3 Acer Aspire ES1-512-C80E Fan Replacement, Keyboard: passo 3, immagine 2 di 3 Acer Aspire ES1-512-C80E Fan Replacement, Keyboard: passo 3, immagine 3 di 3
    • The keyboard is the silver piece located by itself on the upper half of the laptop.

    • Using a Phillips #00 screwdriver, remove the four 1.2mm screws from the keyboard.

    • Using a spudger, go around the edges and pry off the keyboard.

    • All black clips will have to be removed before the keyboard can be removed.

  4. Acer Aspire ES1-512-C80E Fan Replacement: passo 4, immagine 1 di 3 Acer Aspire ES1-512-C80E Fan Replacement: passo 4, immagine 2 di 3 Acer Aspire ES1-512-C80E Fan Replacement: passo 4, immagine 3 di 3
    • Remove the ribbon cable connection from the keyboard.

    • Peel back the two pieces of tape to separate the keyboard.

    • Remove the keyboard from under the plastic covering.

    • Remove the silver plate back cover of the keyboard from the bottom base.

  5. Acer Aspire ES1-512-C80E Fan Replacement: passo 5, immagine 1 di 2 Acer Aspire ES1-512-C80E Fan Replacement: passo 5, immagine 2 di 2
    • Remove the large silver plate from the keyboard.

    • You can not remove the silver backing with the attached wire from the back of the keyboard.

  6. Acer Aspire ES1-512-C80E Fan Replacement: passo 6, immagine 1 di 1
    • The keyboard is removed and ready to be replaced.

  7. Acer Aspire ES1-512-C80E Fan Replacement, Fan: passo 7, immagine 1 di 2 Acer Aspire ES1-512-C80E Fan Replacement, Fan: passo 7, immagine 2 di 2
    • Remove twelve 1.2mm Phillips #000 screws from the motherboard, wireless LAN card, and hard drive.

  8. Acer Aspire ES1-512-C80E Fan Replacement: passo 8, immagine 1 di 3 Acer Aspire ES1-512-C80E Fan Replacement: passo 8, immagine 2 di 3 Acer Aspire ES1-512-C80E Fan Replacement: passo 8, immagine 3 di 3
    • Using a Phillips #000 screwdriver, remove both 1.2mm screws that hold the fan in place.

  9. Acer Aspire ES1-512-C80E Fan Replacement: passo 9, immagine 1 di 3 Acer Aspire ES1-512-C80E Fan Replacement: passo 9, immagine 2 di 3 Acer Aspire ES1-512-C80E Fan Replacement: passo 9, immagine 3 di 3
    • Lift the fan, hard drive, motherboard, and wireless LAN card out of the device.

    • These components are still connected with wires. Remove all plugs that may be attached to other components in order to isolate the group of components.

  10. Acer Aspire ES1-512-C80E Fan Replacement: passo 10, immagine 1 di 1
    • Flip over the motherboard.

    • Remove all three 1.2mm Phillips #00 screws that attach the fan to the motherboard.

  11. Acer Aspire ES1-512-C80E Fan Replacement: passo 11, immagine 1 di 3 Acer Aspire ES1-512-C80E Fan Replacement: passo 11, immagine 2 di 3 Acer Aspire ES1-512-C80E Fan Replacement: passo 11, immagine 3 di 3
    • The fan and motherboard are still connected with wires. Remove any plugs that may be attaching the components

    • Remove the fan from the motherboard.

Conclusione

To reassemble your device, follow these instructions in reverse order.

Altre 2 persone hanno completato questa guida.

0 Commenti

Aggiungi Commento

Visualizza Statistiche:

Ultime 24 Ore: 0

Ultimi 7 Giorni: 2

Ultimi 30 Giorni: 20

Tutti i Tempi: 429