Salta al contenuto principale

Questa guida ha delle modifiche più recenti. Passa all'ultima versione non verificata.

Acer Aspire ES1-332 LCD Screen Replacement

Cosa ti serve

Panoramica Video

  1. Acer Aspire ES1-332 LCD Screen Replacement, LCD Screen: passo 1, immagine 1 di 3 Acer Aspire ES1-332 LCD Screen Replacement, LCD Screen: passo 1, immagine 2 di 3 Acer Aspire ES1-332 LCD Screen Replacement, LCD Screen: passo 1, immagine 3 di 3
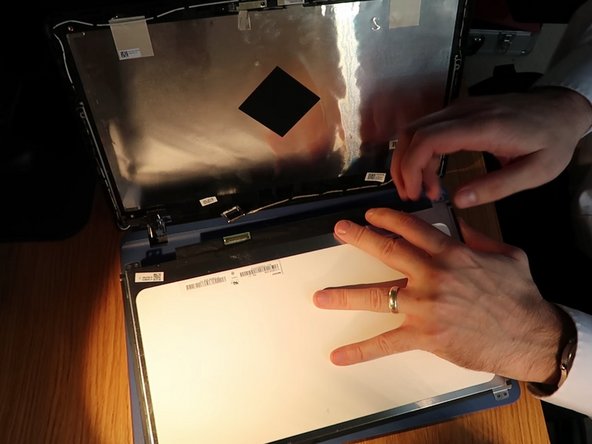
    • Grab a spudger and work your way around the outer edge of the screen

    • Lean the screen all the way back to remove the plastic frame from the hinges at the bottom

  2. Acer Aspire ES1-332 LCD Screen Replacement: passo 2, immagine 1 di 2 Acer Aspire ES1-332 LCD Screen Replacement: passo 2, immagine 2 di 2
    • Unscrew the 4 screws around the edge of the screen

    • Lean the screen all the way forward on to the keyboard

  3. Acer Aspire ES1-332 LCD Screen Replacement: passo 3, immagine 1 di 2 Acer Aspire ES1-332 LCD Screen Replacement: passo 3, immagine 2 di 2
    • Peal up the sticky tape next to the screen connector

    • Pull the connector down carefully away from the screen and disconnect it

  4. Acer Aspire ES1-332 LCD Screen Replacement: passo 4, immagine 1 di 3 Acer Aspire ES1-332 LCD Screen Replacement: passo 4, immagine 2 di 3 Acer Aspire ES1-332 LCD Screen Replacement: passo 4, immagine 3 di 3
    • connect the new screen and screw back in place

    • Turn on the screen to test before putting the screen frame back on

    • Tilt the screen all the way back and push the frame back on hinges 1st.

    • Finally lean the laptop on its edge and clip the back on the hinges back in place.

Linea Traguardo

Un'altra persona ha completato questa guida.

Nick Myers

Membro da: 04/15/18

3.398 Reputazione

21 Guide realizzate

0 Commenti

Aggiungi Commento

Visualizza Statistiche:

Ultime 24 Ore: 0

Ultimi 7 Giorni: 1

Ultimi 30 Giorni: 4

Tutti i Tempi: 674