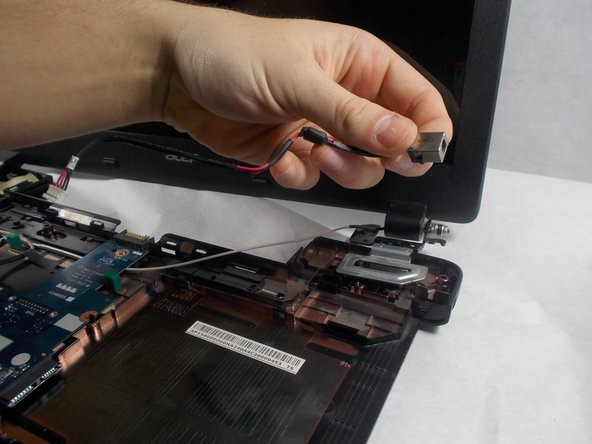
Salta al contenuto principale

Acer Aspire E5-571-58CG Power Jack Replacement

Cosa ti serve

  1. Acer Aspire E5-571-58CG Power Jack Replacement, Battery: passo 1, immagine 1 di 2 Acer Aspire E5-571-58CG Power Jack Replacement, Battery: passo 1, immagine 2 di 2
    • Make sure the laptop is powered off.

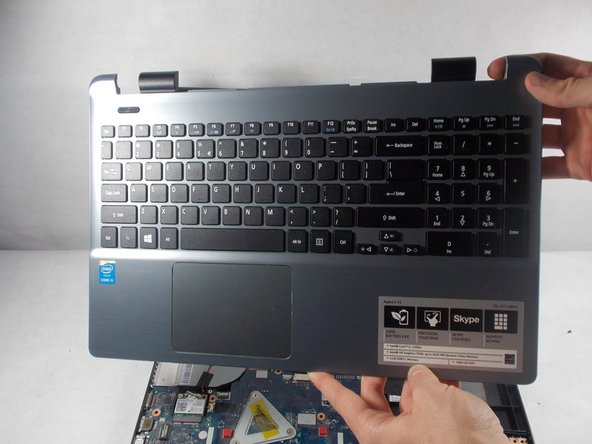
    • Flip the laptop over and locate the battery release switch.

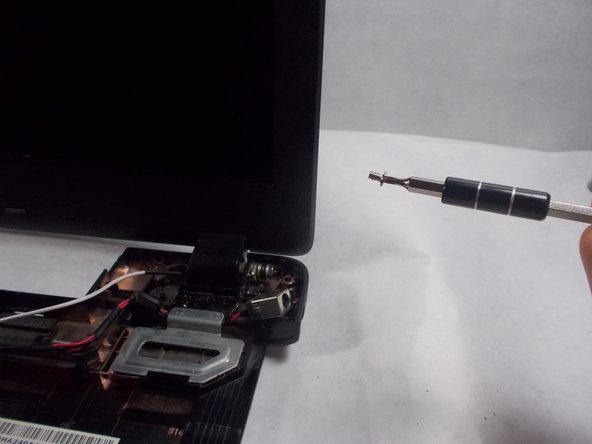
    • Insert the pointed end of the spudger into the battery release switch.

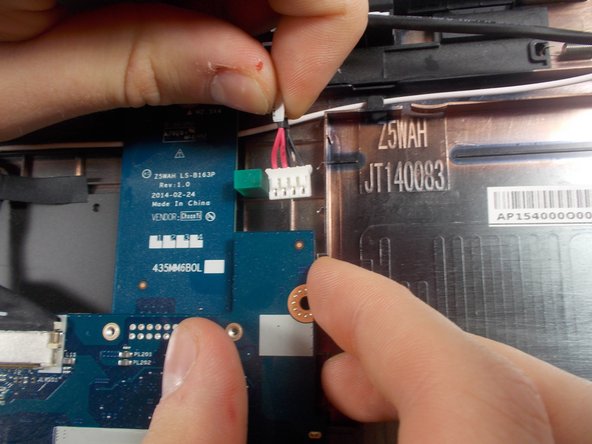
    • Push the battery release switch to the right.

  2. Acer Aspire E5-571-58CG Power Jack Replacement: passo 2, immagine 1 di 3 Acer Aspire E5-571-58CG Power Jack Replacement: passo 2, immagine 2 di 3 Acer Aspire E5-571-58CG Power Jack Replacement: passo 2, immagine 3 di 3
    • While the battery release switch is pushed to the right, carefully slide the battery out of its socket.

  3. Acer Aspire E5-571-58CG Power Jack Replacement, Power Jack: passo 3, immagine 1 di 3 Acer Aspire E5-571-58CG Power Jack Replacement, Power Jack: passo 3, immagine 2 di 3 Acer Aspire E5-571-58CG Power Jack Replacement, Power Jack: passo 3, immagine 3 di 3
    • Remove the top panel of the laptop with the plastic opening tool.

  4. Acer Aspire E5-571-58CG Power Jack Replacement: passo 4, immagine 1 di 2 Acer Aspire E5-571-58CG Power Jack Replacement: passo 4, immagine 2 di 2
    • Remove the plastic safeguard from the CD drive slot.

  5. Acer Aspire E5-571-58CG Power Jack Replacement: passo 5, immagine 1 di 3 Acer Aspire E5-571-58CG Power Jack Replacement: passo 5, immagine 2 di 3 Acer Aspire E5-571-58CG Power Jack Replacement: passo 5, immagine 3 di 3
    • Remove the marked screws with the JIS #00 screwdriver.

  6. Acer Aspire E5-571-58CG Power Jack Replacement: passo 6, immagine 1 di 2 Acer Aspire E5-571-58CG Power Jack Replacement: passo 6, immagine 2 di 2
    • Disconnect the opposite end of the power jack from the motherboard by carefully pulling the wire.

  7. Acer Aspire E5-571-58CG Power Jack Replacement: passo 7, immagine 1 di 2 Acer Aspire E5-571-58CG Power Jack Replacement: passo 7, immagine 2 di 2
    • Lift the bottom right side of the screen to move the metal plate covering the power jack.

  8. Acer Aspire E5-571-58CG Power Jack Replacement: passo 8, immagine 1 di 2 Acer Aspire E5-571-58CG Power Jack Replacement: passo 8, immagine 2 di 2
    • Carefully lift the power jack out of the laptop.

Conclusione

To reassemble your device, follow these instructions in reverse order.

Un'altra persona ha completato questa guida.

Team

0 Commenti

Aggiungi Commento

Visualizza Statistiche:

Ultime 24 Ore: 0

Ultimi 7 Giorni: 2

Ultimi 30 Giorni: 10

Tutti i Tempi: 1,255