Salta al contenuto principale

Access to RAM and CPU from why! W253EU

Cosa ti serve

  1. Access to RAM and CPU from why! W253EU, Battery from why! Remove W253EU: passo 1, immagine 1 di 3 Access to RAM and CPU from why! W253EU, Battery from why! Remove W253EU: passo 1, immagine 2 di 3 Access to RAM and CPU from why! W253EU, Battery from why! Remove W253EU: passo 1, immagine 3 di 3
    • Turn off the computer.

    • Before each operation it is important to start with the removal of the accumulator.

    • Take the slide unlocked into position, remove the battery.

  2. Access to RAM and CPU from why! W253EU, Access to RAM and CPU from why! W253EU: passo 2, immagine 1 di 2 Access to RAM and CPU from why! W253EU, Access to RAM and CPU from why! W253EU: passo 2, immagine 2 di 2
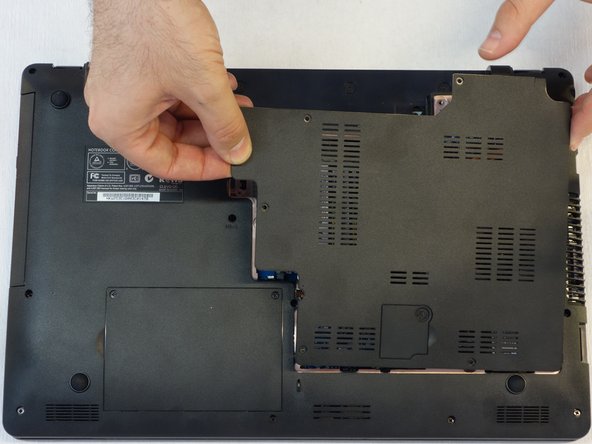
    • Using a Philips #1 screwdriver, unscrew the 5 screws securing the cover.

  3. Access to RAM and CPU from why! W253EU: passo 3, immagine 1 di 3 Access to RAM and CPU from why! W253EU: passo 3, immagine 2 di 3 Access to RAM and CPU from why! W253EU: passo 3, immagine 3 di 3
    • Push the screwdriver a few millimeters under the cover so that it can be touched with your fingers.

    • Now lift the cover carefully.

    • Attention! Disconnect the ventillator cable so that the cover can be completely removed (see next step).

  4. Access to RAM and CPU from why! W253EU: passo 4, immagine 1 di 1
    • Since the ventillator is mounted under the cover, its power supply cable must first be disconnected so that the cover can then be completely removed.

Conclusione

For reassembly, follow the instructions in reverse order.

Un ringraziamento speciale a questi traduttori:

de en

100%

Questi traduttori ci stanno aiutando ad aggiustare il mondo! Vuoi partecipare?
Inizia a tradurre ›

Felice Suglia

Membro da: 06/15/13

30.884 Reputazione

264 Guide realizzate

0 Commenti

Aggiungi Commento

Visualizza Statistiche:

Ultime 24 Ore: 0

Ultimi 7 Giorni: 1

Ultimi 30 Giorni: 2

Tutti i Tempi: 257