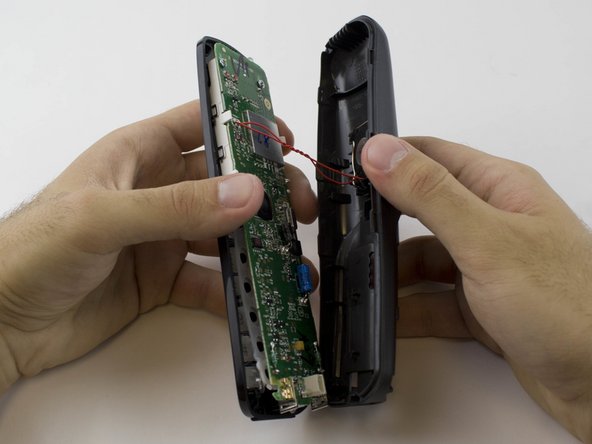
Salta al contenuto principale

ATT EL52300 Motherboard Replacement

Cosa ti serve

  1. ATT EL52300 Motherboard Replacement, Battery: passo 1, immagine 1 di 2 ATT EL52300 Motherboard Replacement, Battery: passo 1, immagine 2 di 2
    • Find the bump where the battery cover meets the phone. Put your thumb here, and push and slide the cover down.

  2. ATT EL52300 Motherboard Replacement: passo 2, immagine 1 di 1
    • Unplug the battery by squeezing your hands on the small white plug and lifting it up.

    • Do not pull on the wire itself because you might damage the wire!

    • The battery is now detached and ready to be removed by lifting it out.

  3. ATT EL52300 Motherboard Replacement, Motherboard: passo 3, immagine 1 di 2 ATT EL52300 Motherboard Replacement, Motherboard: passo 3, immagine 2 di 2
    • Remove the two 3.75 mm screws with a PH1 screwdriver.

  4. ATT EL52300 Motherboard Replacement: passo 4, immagine 1 di 2 ATT EL52300 Motherboard Replacement: passo 4, immagine 2 di 2
    • Use a plastic opening tool to remove the handset case.

    • Be careful to not lift the case too far as the ringer cable is attached to the case.

  5. ATT EL52300 Motherboard Replacement: passo 5, immagine 1 di 2 ATT EL52300 Motherboard Replacement: passo 5, immagine 2 di 2
    Attrezzo utilizzato in questo passaggio:
    Anti-Static Wrist Strap
    $7.95
    Compra
    • Remove the two 3.65 mm screws on the motherboard with a PH1 screwdriver.

    • Use an anti-static wrist strap to prevent damage to the motherboard.

Conclusione

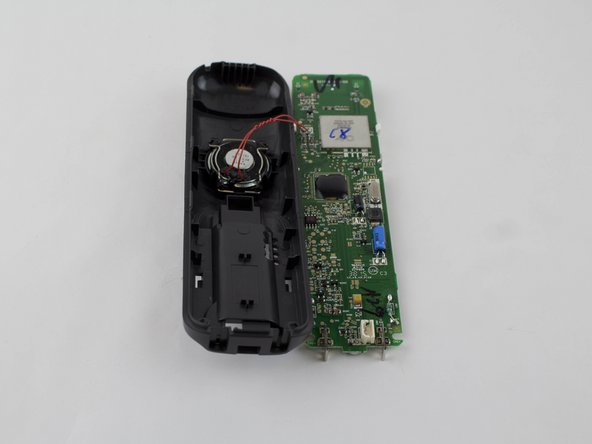
To reassemble your device, follow these instructions in reverse order.

Un'altra persona ha completato questa guida.

Nam Mai

Membro da: 02/10/16

462 Reputazione

1 Guida realizzata

Team

USF Tampa, Team 1-1, Sullivan Spring 2016 Membro di USF Tampa, Team 1-1, Sullivan Spring 2016

USFT-SULLIVAN-S16S1G1

4 Membri

10 Guide realizzate

0 Commenti

Aggiungi Commento

Visualizza Statistiche:

Ultime 24 Ore: 0

Ultimi 7 Giorni: 1

Ultimi 30 Giorni: 1

Tutti i Tempi: 536