Introduzione
It is possible that your battery has stopped working due to physical or electrical damage. A replacement batter will need to be purchased. After purchasing a new battery follow these steps to replace your broken battery.
Cosa ti serve
-
-
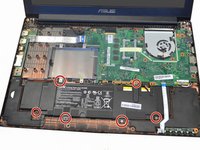
Use the Phillips #00 screwdriver to remove the seven 90mm screws.
-
Use the Phillips #00 screwdriver to remove the four 50mm screws.
 Chiedi a FixBot
-
-
-
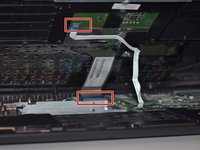
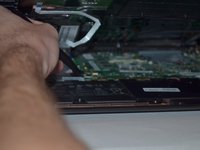
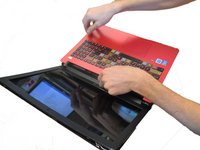
Next, use the plastic opening tool to carefully pop off the keyboard cover panel.
-
-
Strumento utilizzato in questo passaggio:Tweezers$4.99
-
Lift palm rest and unplug keyboard cable and touchpad cable using tweezers. After these two cables have been unplugged you can remove the keyboard cover panel.
-
-
-
-
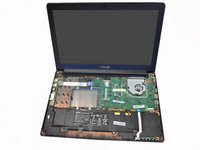
Next, locate the battery in the front of laptop (closest to you).
-
-
Strumento utilizzato in questo passaggio:Tweezers$4.99
-
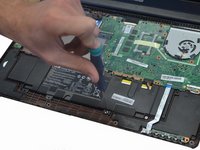
Unplug the battery from the laptop in the upper right hand corner of the battery using tweezers.
-
-
-
Use the Phillips #00 Screwdriver to carefully remove the 6 screws holding the battery in place.
-
Once you have removed all six screws carefully lift the battery out and dispose.
-


To reassemble your device, follow these instructions in reverse order.
Annulla: non ho completato questa guida.
Altre 5 persone hanno completato questa guida.
Team

Clemson, Team 14-1, Shirley Winter 2015 Membro di Clemson, Team 14-1, Shirley Winter 2015
CLEM-SHIRLEY-W15S14G1
5 Membri
5 guide realizzate