Salta al contenuto principale

ASUS U52F-BBG6 Screen Replacement

Cosa ti serve

  1. ASUS U52F-BBG6 Screen Replacement, Screen: passo 1, immagine 1 di 3 ASUS U52F-BBG6 Screen Replacement, Screen: passo 1, immagine 2 di 3 ASUS U52F-BBG6 Screen Replacement, Screen: passo 1, immagine 3 di 3
    • Scrape off the black circle rubber cushions with your index finger at the bottom frame of the screen.

    • The cushions may no longer be adherent and a bit of glue may be needed to reattach them.

    • Unscrew the two 3mm Phillips screws that were hidden under the cushions using J1 screwdriver.

  2. ASUS U52F-BBG6 Screen Replacement: passo 2, immagine 1 di 2 ASUS U52F-BBG6 Screen Replacement: passo 2, immagine 2 di 2
    • Insert the plastic opening tool into the crack where the plastic of the screen's frame meets the shell at the top.

    • Be careful not to scratch the screen with the opening tool.

    • Gently twist and slide the tool to open it. The plastic will snap as the frame is released.

    • The snaps that hold the frame to the shell are fragile.

    • Continue to pry with the tool or use your fingers until the top portion of the frame is released.

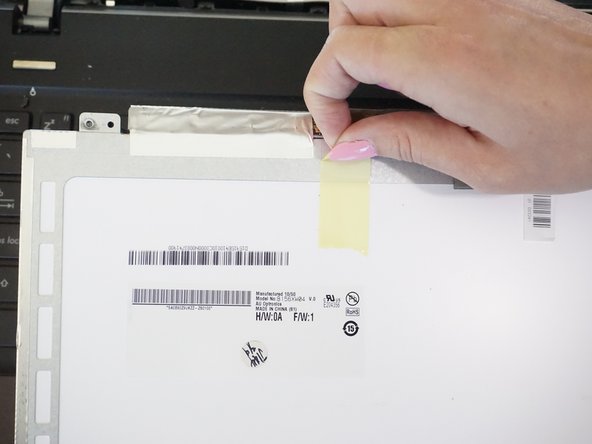
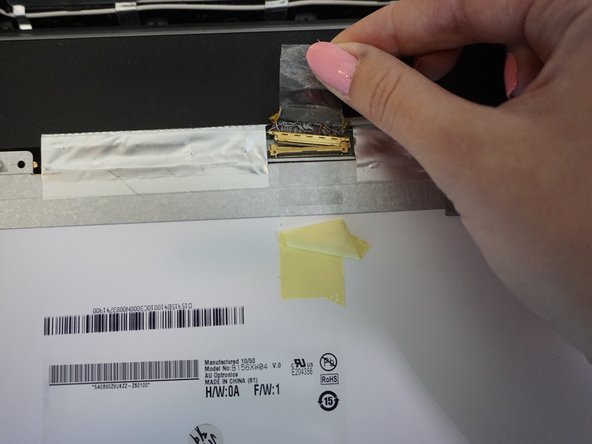
    • Pull the screen frame towards you so that the seam between the frame and the screen is opened.

  3. ASUS U52F-BBG6 Screen Replacement: passo 3, immagine 1 di 2 ASUS U52F-BBG6 Screen Replacement: passo 3, immagine 2 di 2
    • Insert the opening tool into the seam.

    • Try not to scratch the screen with the opening tool.

    • Pry the frame with the opening tool as shown in step 2.

    • Peel off the metallic tape that's attached to the bottom of the frame inside of the shell.

  4. ASUS U52F-BBG6 Screen Replacement: passo 4, immagine 1 di 2 ASUS U52F-BBG6 Screen Replacement: passo 4, immagine 2 di 2
    • Unscrew the four 3mm Phillips screws with the J0 screwdriver on each corner of the screen.

  5. ASUS U52F-BBG6 Screen Replacement: passo 5, immagine 1 di 1
    • Peel off the metallic tape on the top right side of the screen.

  6. ASUS U52F-BBG6 Screen Replacement: passo 6, immagine 1 di 2 ASUS U52F-BBG6 Screen Replacement: passo 6, immagine 2 di 2
    • Lay the screen down flat on the keyboard.

    • Peel the yellow tape and then the metallic tape holding the screen's connection to the computer.

    • The metallic tape is hidden underneath the yellow tape.

  7. ASUS U52F-BBG6 Screen Replacement: passo 7, immagine 1 di 3 ASUS U52F-BBG6 Screen Replacement: passo 7, immagine 2 di 3 ASUS U52F-BBG6 Screen Replacement: passo 7, immagine 3 di 3
    • Unlatch the golden connector under the metallic tape using the flat side of the nylon spudger.

    • Gently lift the connector and peel the metallic tape to detach the wire on your right that holds it in place.

    • Lift the now freed screen.

Conclusione

To reassemble your device, follow these instructions in reverse order.

Team

CSU Fullerton, Team 1-3, Bruce Fall 2016 Membro di CSU Fullerton, Team 1-3, Bruce Fall 2016

CSUF-BRUCE-F16S1G3

4 Membri

9 Guide realizzate

0 Commenti

Aggiungi Commento

Visualizza Statistiche:

Ultime 24 Ore: 0

Ultimi 7 Giorni: 1

Ultimi 30 Giorni: 3

Tutti i Tempi: 396