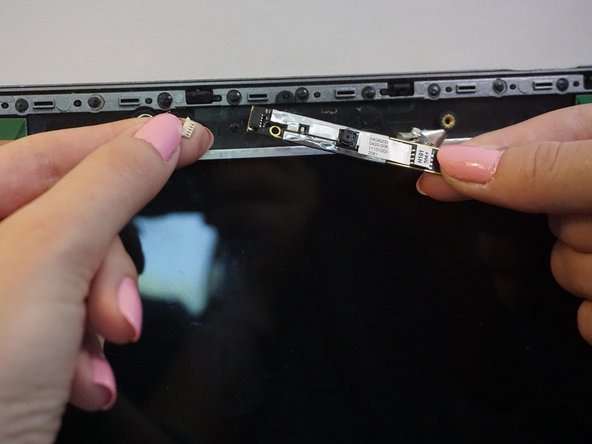
Salta al contenuto principale

ASUS U52F-BBG6 Camera Replacement

Cosa ti serve

  1. ASUS U52F-BBG6 Camera Replacement, Camera: passo 1, immagine 1 di 2 ASUS U52F-BBG6 Camera Replacement, Camera: passo 1, immagine 2 di 2
    • Scrape off the black circle rubber cushions with your index finger at the bottom frame of the screen.

    • The cushions may no longer be adherent and a bit of glue may be needed to reattach them.

    • Unscrew the two 3mm Phillips screws on the bottom of the frame with the J1 screwdriver.

    • The two 3mm Phillips screws are hidden behind the cushions.

  2. ASUS U52F-BBG6 Camera Replacement: passo 2, immagine 1 di 2 ASUS U52F-BBG6 Camera Replacement: passo 2, immagine 2 di 2
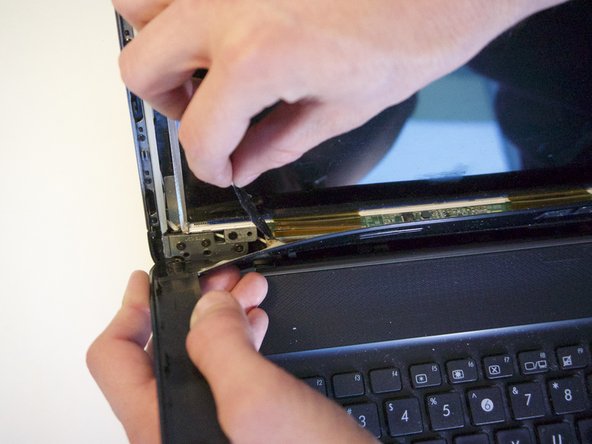
    • Insert the plastic opening tool into the crack where the plastic of the screen's frame meets the shell at the top.

    • Be careful not to scratch the screen with the opening tool.

    • Gently twist and slide the tool to open it. The plastic will snap as the frame is released.

    • The snaps that hold the frame to the shell are fragile.

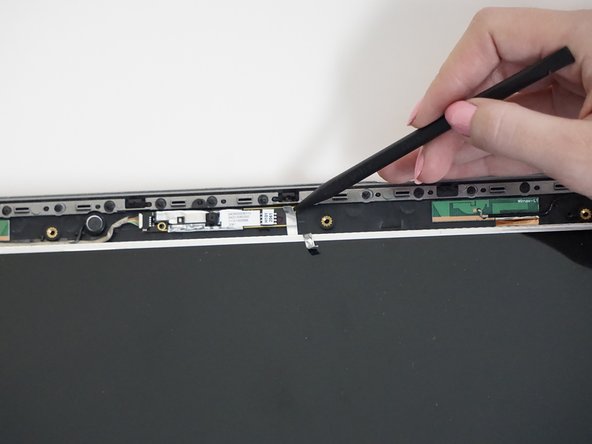
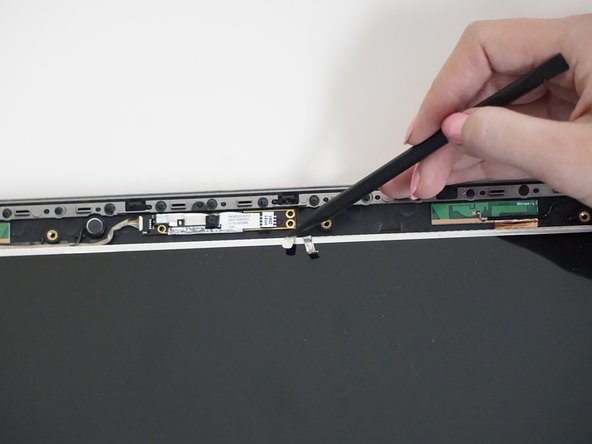
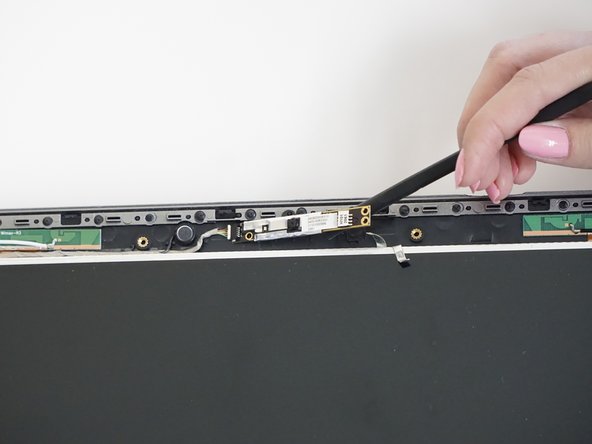
    • Continue to pry with the opening tool or use your fingers until the top portion of the frame releases.

  3. ASUS U52F-BBG6 Camera Replacement: passo 3, immagine 1 di 2 ASUS U52F-BBG6 Camera Replacement: passo 3, immagine 2 di 2
    • Pull the screen frame towards you so that the seam between the frame and the bottom of the screen is opened.

    • Insert the opening tool into the seam.

    • Be careful not to scratch the screen with the opening tool.

    • Peel the metallic strip with your finger and thumb until it's fully off.

    • Place the remaining frame down on the keyboard.

  4. ASUS U52F-BBG6 Camera Replacement: passo 4, immagine 1 di 2 ASUS U52F-BBG6 Camera Replacement: passo 4, immagine 2 di 2
    • Use the pointed side of the black spudger to remove the metallic stickers by the circuit board of the camera above the screen.

    • Do not remove the sticker completely.

  5. ASUS U52F-BBG6 Camera Replacement: passo 5, immagine 1 di 2 ASUS U52F-BBG6 Camera Replacement: passo 5, immagine 2 di 2
    • Carefully lift the camera's circuit board by using the flat side of the spudger.

    • The adherent on the camera's circuit board is very sticky.

  6. ASUS U52F-BBG6 Camera Replacement: passo 6, immagine 1 di 2 ASUS U52F-BBG6 Camera Replacement: passo 6, immagine 2 di 2
    • Holding the camera's circuit board with your right hand, use your left index finger and thumb to unplug the micro white hook from the camera.

    • The micro white hook is fragile.

Conclusione

To reassemble your device, follow these instructions in reverse order.

Un'altra persona ha completato questa guida.

Team

CSU Fullerton, Team 1-3, Bruce Fall 2016 Membro di CSU Fullerton, Team 1-3, Bruce Fall 2016

CSUF-BRUCE-F16S1G3

4 Membri

9 Guide realizzate

0 Commenti

Aggiungi Commento

Visualizza Statistiche:

Ultime 24 Ore: 0

Ultimi 7 Giorni: 3

Ultimi 30 Giorni: 8

Tutti i Tempi: 230