Salta al contenuto principale

ASUS K200MA-DS01T Back Panel Removal

Cosa ti serve

  1. ASUS K200MA-DS01T Back Panel Removal, Back Panel: passo 1, immagine 1 di 2 ASUS K200MA-DS01T Back Panel Removal, Back Panel: passo 1, immagine 2 di 2
    • With the opening facing you, flip the laptop over and remove the following screws from the back panel:

    • Six 4mm Phillips screws using a Phillips #0 screwdriver.

    • One 12mm Phillips screw in the center using a Phillips #0 screwdriver.

  2. ASUS K200MA-DS01T Back Panel Removal: passo 2, immagine 1 di 2 ASUS K200MA-DS01T Back Panel Removal: passo 2, immagine 2 di 2
    • Using a plastic spudger, remove the two rubber stoppers closest to the hinge to reveal the screws underneath.

  3. ASUS K200MA-DS01T Back Panel Removal: passo 3, immagine 1 di 1
    • Remove the following screws:

    • Two 4mm Phillips screws using a Phillips #0 screwdriver.

  4. ASUS K200MA-DS01T Back Panel Removal: passo 4, immagine 1 di 3 ASUS K200MA-DS01T Back Panel Removal: passo 4, immagine 2 di 3 ASUS K200MA-DS01T Back Panel Removal: passo 4, immagine 3 di 3
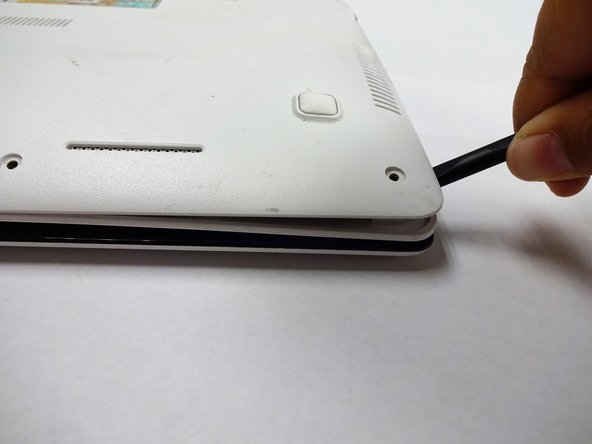
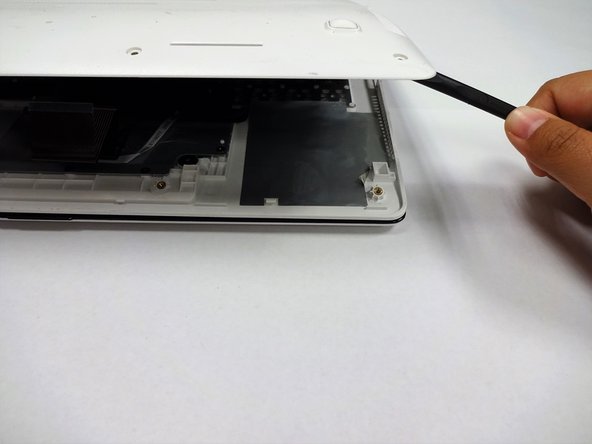
    • Using a plastic spudger (and a fair amount of force), pry the back panel up from the keyboard to separate.

    • You may have to use one spudger to wedge between the back panel and keyboard while using another to pry it open in a different spot.

Conclusione

To reassemble your device, follow these instructions in reverse order.

Team

0 Commenti

Aggiungi Commento

Visualizza Statistiche:

Ultime 24 Ore: 0

Ultimi 7 Giorni: 0

Ultimi 30 Giorni: 0

Tutti i Tempi: 183