Salta al contenuto principale

ACN Iris WG4K Key Pad Replacement

Cosa ti serve

  1. ACN Iris WG4K Key Pad Replacement, Handset: passo 1, immagine 1 di 2 ACN Iris WG4K Key Pad Replacement, Handset: passo 1, immagine 2 di 2
    • Press upwards with your index finger on the 4P4C connector as shown in the image.

    • Pull the connector gently out of its socket.

  2. ACN Iris WG4K Key Pad Replacement, Lower Case: passo 2, immagine 1 di 1
    • Flip the main body of the video phone so that the bottom is facing up.

    • Use the Phillips #0 Screwdriver to remove the four Phillips head screws (6 mm) highlighted by the red circles.

  3. ACN Iris WG4K Key Pad Replacement: passo 3, immagine 1 di 2 ACN Iris WG4K Key Pad Replacement: passo 3, immagine 2 di 2
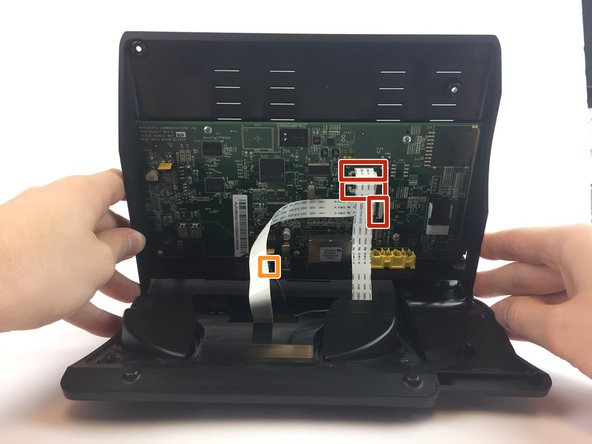
    • Lift the back case upwards to expose the inside components.

    • Red rectangles indicate the three ribbon cables.

    • The orange square indicates the blade connector.

  4. ACN Iris WG4K Key Pad Replacement: passo 4, immagine 1 di 3 ACN Iris WG4K Key Pad Replacement: passo 4, immagine 2 di 3 ACN Iris WG4K Key Pad Replacement: passo 4, immagine 3 di 3
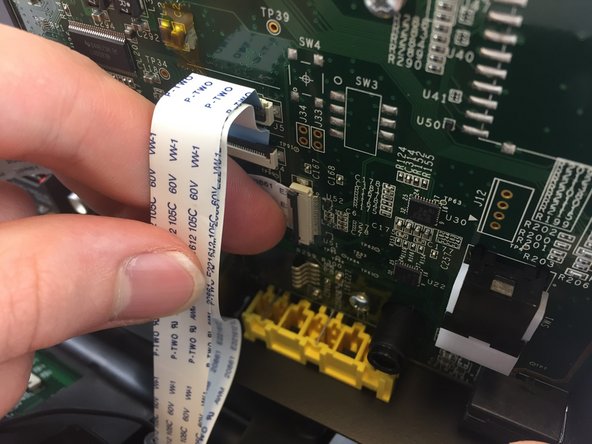
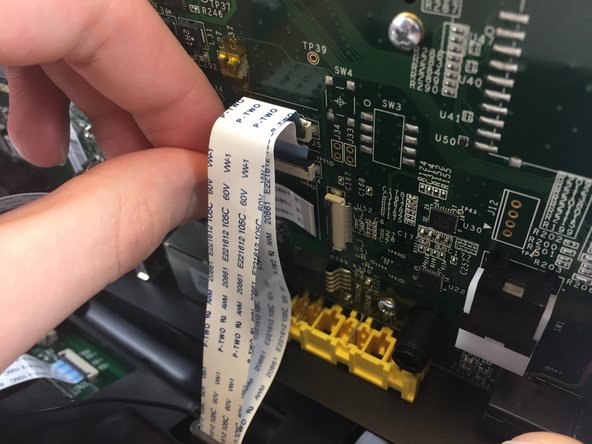
    • Disconnect the three ribbon cables from their insulation-displacement connectors by flipping up the black plastic clip.

    • Gently pull the ribbon cables out of their insulation-displacement connectors.

  5. ACN Iris WG4K Key Pad Replacement: passo 5, immagine 1 di 2 ACN Iris WG4K Key Pad Replacement: passo 5, immagine 2 di 2
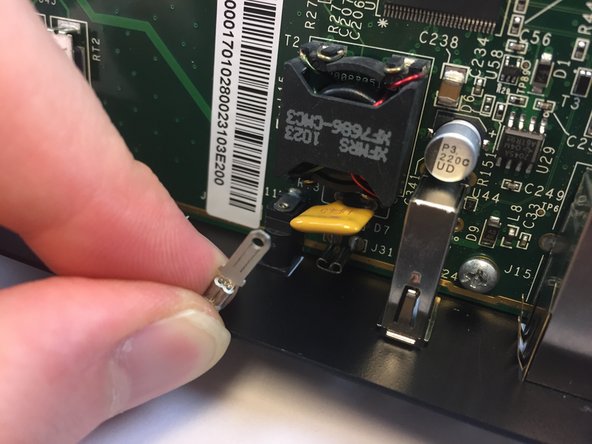
    • Disconnect the blade connector from the blade receptacle by gripping the exposed area of the blade connector.

    • Gently pull the blade connector out of the blade receptacle.

  6. ACN Iris WG4K Key Pad Replacement: passo 6, immagine 1 di 1
    • Gently lift up the lower case to separate it from the top case.

  7. ACN Iris WG4K Key Pad Replacement, Key Pad: passo 7, immagine 1 di 1
    • Use the Phillips #0 Screwdriver to remove the four Phillips head screws 6 mm highlighted by the red circles.

  8. ACN Iris WG4K Key Pad Replacement: passo 8, immagine 1 di 1
    • Gently lift up on the top case to separate it from the keypad/speaker panel.

  9. ACN Iris WG4K Key Pad Replacement: passo 9, immagine 1 di 2 ACN Iris WG4K Key Pad Replacement: passo 9, immagine 2 di 2
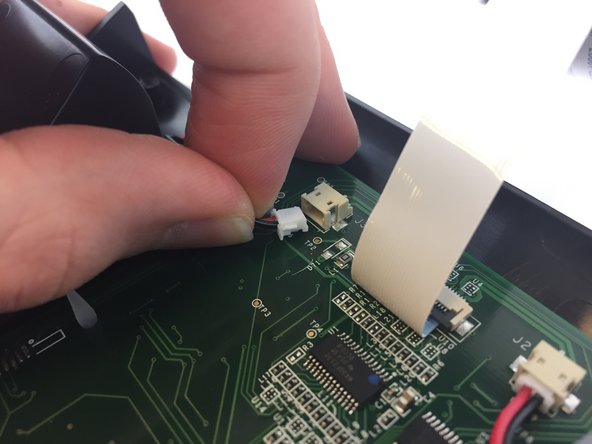
    • Disconnect the two white 2-pin JST connectors from the keypad/speaker circuit board by tugging gently until they are released.

  10. ACN Iris WG4K Key Pad Replacement: passo 10, immagine 1 di 1
    • Use the Philips screw driver to remove the four Phillips head screws 6 mm highlighted by the red circles.

Conclusione

To reassemble your device, follow these instructions in reverse order.

Un'altra persona ha completato questa guida.

Itze Kenney

Membro da: 02/14/17

1.066 Reputazione

9 Guide realizzate

Team

USF Tampa, Team 20-4, Remmell Spring 2017 Membro di USF Tampa, Team 20-4, Remmell Spring 2017

USFT-REMMELL-S17S20G4

4 Membri

20 Guide realizzate

0 Commenti

Aggiungi Commento

Visualizza Statistiche:

Ultime 24 Ore: 0

Ultimi 7 Giorni: 0

Ultimi 30 Giorni: 0

Tutti i Tempi: 168