Salta al contenuto principale

3DR Iris Plus Quadcopter RX Transmitter Replacement

Cosa ti serve

  1. 3DR Iris Plus Quadcopter RX Transmitter Replacement, Battery: passo 1, immagine 1 di 1
    • Power off the drone by holding down the power button.

    • Remove the battery by disconnecting it from the main battery connector.

    • Press the power button again to ensure all electricity is discharged.

    • This step is imperative as it is dangerous to handle drone components with a running current!

  2. 3DR Iris Plus Quadcopter RX Transmitter Replacement, Gimbal: passo 2, immagine 1 di 3 3DR Iris Plus Quadcopter RX Transmitter Replacement, Gimbal: passo 2, immagine 2 di 3 3DR Iris Plus Quadcopter RX Transmitter Replacement, Gimbal: passo 2, immagine 3 di 3
    • If your drone is equipped with it, remove the video transmitter.

    • Disconnect all cables from the gimbal.

    • If your drone has neither the gimbal or video transmitter, you can skip this step.

  3. 3DR Iris Plus Quadcopter RX Transmitter Replacement: passo 3, immagine 1 di 2 3DR Iris Plus Quadcopter RX Transmitter Replacement: passo 3, immagine 2 di 2
    • Unscrew the 16 mm screw attaching the gimbal mount to the body of the drone using the 3 mm Hex screwdriver/key.

  4. 3DR Iris Plus Quadcopter RX Transmitter Replacement: passo 4, immagine 1 di 2 3DR Iris Plus Quadcopter RX Transmitter Replacement: passo 4, immagine 2 di 2
    • Rotate the drone 180 degrees.

    • Unscrew the other 16mm gimbal mount screw using the 3 mm Hex screwdriver/key.

  5. 3DR Iris Plus Quadcopter RX Transmitter Replacement: passo 5, immagine 1 di 1
    • Remove the gimbal mount from the body of the drone.

  6. 3DR Iris Plus Quadcopter RX Transmitter Replacement, Bottom Shell: passo 6, immagine 1 di 2 3DR Iris Plus Quadcopter RX Transmitter Replacement, Bottom Shell: passo 6, immagine 2 di 2
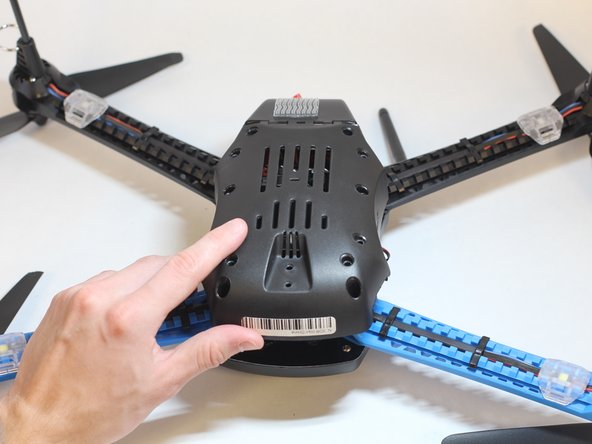
    • Remove the eight 11mm screws attaching the underbody of the drone using the 2mm Hex screwdriver/key.

  7. 3DR Iris Plus Quadcopter RX Transmitter Replacement: passo 7, immagine 1 di 3 3DR Iris Plus Quadcopter RX Transmitter Replacement: passo 7, immagine 2 di 3 3DR Iris Plus Quadcopter RX Transmitter Replacement: passo 7, immagine 3 di 3
    • Remove the two larger, 12mm screws attached to the Go Pro mount using the 3mm Hex screwdriver/key.

    • Lift to remove the mount.

  8. 3DR Iris Plus Quadcopter RX Transmitter Replacement: passo 8, immagine 1 di 3 3DR Iris Plus Quadcopter RX Transmitter Replacement: passo 8, immagine 2 di 3 3DR Iris Plus Quadcopter RX Transmitter Replacement: passo 8, immagine 3 di 3
    • Feed both wires through the grill of the bottom shell.

    • Lift to remove the shell.

    • There are two cables tethering the shell to the body of the drone. It is difficult and unnecessary to remove them. Simply lay the shell to the side.

  9. 3DR Iris Plus Quadcopter RX Transmitter Replacement, Top Shell: passo 9, immagine 1 di 3 3DR Iris Plus Quadcopter RX Transmitter Replacement, Top Shell: passo 9, immagine 2 di 3 3DR Iris Plus Quadcopter RX Transmitter Replacement, Top Shell: passo 9, immagine 3 di 3
    • With the back plate off, remove the three 4mm screws using the Hex 2 mm screwdriver. These secure the top plate to the drone assembly.

  10. 3DR Iris Plus Quadcopter RX Transmitter Replacement: passo 10, immagine 1 di 2 3DR Iris Plus Quadcopter RX Transmitter Replacement: passo 10, immagine 2 di 2
    • Rotate the drone 180 degrees (top facing up) and remove the top plate from the drone.

    • Exercise caution as there are wires and components attached to the underside of the top plate!

  11. 3DR Iris Plus Quadcopter RX Transmitter Replacement, RX Transmitter: passo 11, immagine 1 di 1
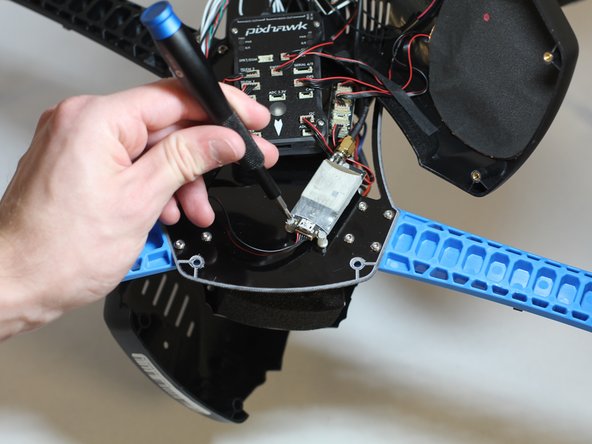
    • Using your fingers, gently twist and disconnect the gold part on the cable attached to the RX Transmitter.

  12. 3DR Iris Plus Quadcopter RX Transmitter Replacement: passo 12, immagine 1 di 1
    • Lightly pull the wire to disconnect it from the RX Transmitter.

  13. 3DR Iris Plus Quadcopter RX Transmitter Replacement: passo 13, immagine 1 di 2 3DR Iris Plus Quadcopter RX Transmitter Replacement: passo 13, immagine 2 di 2
    • Using the Phillips #1 screwdriver, remove the three 5mm screws that attach the RX transmitter to the drone assembly.

    • Lift to remove the RX Transmitter.

Conclusione

To reassemble your device, follow these instructions in reverse order.

Altre 5 persone hanno completato questa guida.

Emily Truong

Membro da: 02/10/20

262 Reputazione

1 Guida realizzata

Team

Cal Poly, Team S7-G5, Regan Winter 2020 Membro di Cal Poly, Team S7-G5, Regan Winter 2020

CPSU-REGAN-W20S7G5

5 Membri

9 Guide realizzate

0 Commenti

Aggiungi Commento

Visualizza Statistiche:

Ultime 24 Ore: 0

Ultimi 7 Giorni: 2

Ultimi 30 Giorni: 4

Tutti i Tempi: 381