Questa versione può contenere modifiche errate. Passa all'ultima istantanea verificata.
Cosa ti serve
-
Questo passaggio è privo di traduzione. Aiuta a tradurlo
-
The first step is to remove the door handle and speaker cover. This is easily done by prying it off the plastic tabs with a flathead screwdriver or possibly even your hands.
-
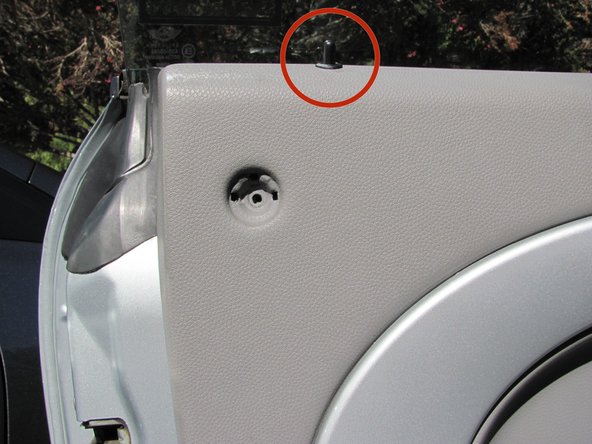
Next you need to remove the four size T30 torx screws that hold the panel in place. Three of these are in the obvious screw holes shown but the last is hidden behind the colored reflector, which you will need to pry off. It is easy to remove with a small flathead screwdriver. Of the four screws, two are 18mm and the other two are 52.5mm long.
-
-
Questo passaggio è privo di traduzione. Aiuta a tradurlo
-
With the screws removed, you will need to pry the panel off of the door using a prybar or flathead screwdriver. I wrapped my screwdriver in electrical tape to keep it from scratching the car.
-
The bottom and sides of the panel are held on with one type of clip while the top is held on by another. Because of this, you want to start prying it somewhere along the bottom edge of the panel, I chose the lower outside corner.
-
-
-
Questo passaggio è privo di traduzione. Aiuta a tradurlo
-
Once you have the bottom and sides of the panel popped off the tabs, you want to to a combination of lifting and pulling along the top edge to remove it from these other types of tabs.
-
Once the panel is free from these, you can slide it over the door lock knob and pull the whole thing away.
-
That's it. You now have access to the rest of the door. In order to put the panel back on, just follow these directions in reverse order.
-
-
Questo passaggio è privo di traduzione. Aiuta a tradurlo
-
After removing the door panel, you will have access to the door handle assembly.
-
This assembly is attached to the door with three Phillips screws, which you will need to remove.
-
Once those screws are removed, the assembly is free from the door, allowing access to the door lock cable and the window actuator. Replacing the handle assembly requires screwing it back into the yellow screwholes shown.
-


Annulla: non ho completato questa guida.
Altre 2 persone hanno completato questa guida.
Team

Cal Poly, Team 8-19, Regan Fall 2013 Membro di Cal Poly, Team 8-19, Regan Fall 2013
CPSU-REGAN-F13S8G19
3 Membri
4 Guide realizzate