Salta al contenuto principale

How to Repair a Locket Hinge

Cosa ti serve

  1. How to Repair a Locket Hinge, How to Repair a Locket Hinge: passo 1, immagine 1 di 3 How to Repair a Locket Hinge, How to Repair a Locket Hinge: passo 1, immagine 2 di 3 How to Repair a Locket Hinge, How to Repair a Locket Hinge: passo 1, immagine 3 di 3
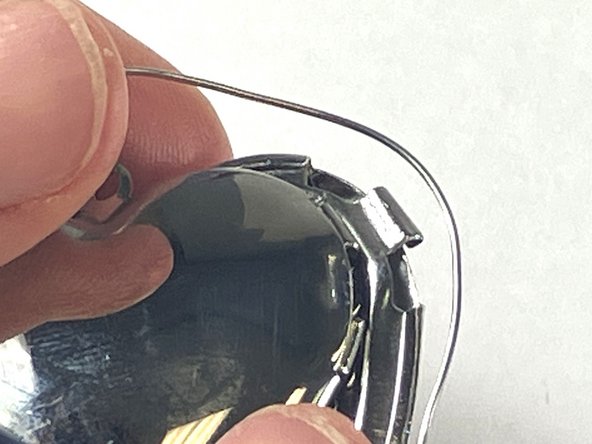
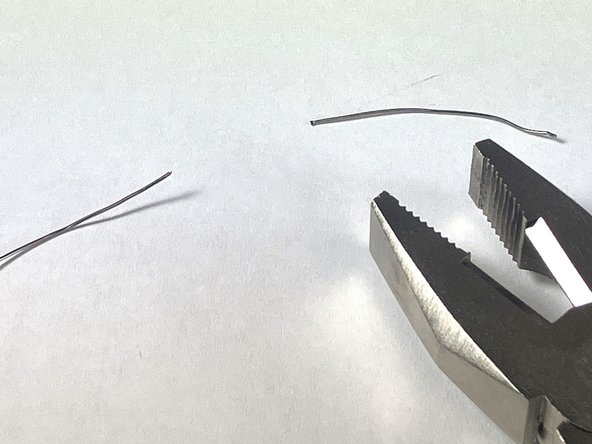
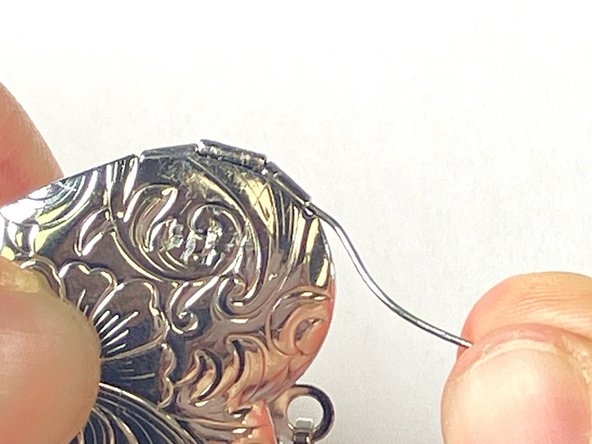
    • Use pliers to carefully bend the damaged hinge back into place.

    • You want the hinge to be rounded and hollow, like a straw.

    • Test the hinge with some wire. If you can easily thread the wire through, then you can move on to Step 2. If not, keep bending.

  2. How to Repair a Locket Hinge: passo 2, immagine 1 di 3 How to Repair a Locket Hinge: passo 2, immagine 2 di 3 How to Repair a Locket Hinge: passo 2, immagine 3 di 3
    • Hold both ends of the wire.

    • Place the middle of the wire against a hard edge. Hold the wire so that it is perpendicular to the edge.

    • Straighten the wire by pulling it against the edge.

  3. How to Repair a Locket Hinge: passo 3, immagine 1 di 2 How to Repair a Locket Hinge: passo 3, immagine 2 di 2
    • Bend the wire to match the contours of your locket.

    • If your locket is rounded, your wire will have to be curved. If your locket is straight, your wire will have to be straight.

  4. How to Repair a Locket Hinge: passo 4, immagine 1 di 2 How to Repair a Locket Hinge: passo 4, immagine 2 di 2
    • Cut the wire to a manageable length. We suggest the length of the hinges plus some excess.

  5. How to Repair a Locket Hinge: passo 5, immagine 1 di 3 How to Repair a Locket Hinge: passo 5, immagine 2 di 3 How to Repair a Locket Hinge: passo 5, immagine 3 di 3
    • Match and align the front and back of the locket.

    • The holes of the hinge must be aligned, making a tunnel for the wire.

    • Line up the curved wire to match the locket shape.

    • Feed the wire through the hole of the hinge.

  6. How to Repair a Locket Hinge: passo 6, immagine 1 di 3 How to Repair a Locket Hinge: passo 6, immagine 2 di 3 How to Repair a Locket Hinge: passo 6, immagine 3 di 3
    • Hold the locket closed.

    • Glue the top of the hinge.

    • Glue the bottom of the hinge.

    • Do not glue the center of the hinge.

  7. How to Repair a Locket Hinge: passo 7, immagine 1 di 2 How to Repair a Locket Hinge: passo 7, immagine 2 di 2
    • Hold the locket closed and hammer the side with the hinge and wire.

    • Tap firmly along the hinge and wire to secure.

  8. How to Repair a Locket Hinge: passo 8, immagine 1 di 2 How to Repair a Locket Hinge: passo 8, immagine 2 di 2
    • Cut the excess wire.

  9. How to Repair a Locket Hinge: passo 9, immagine 1 di 2 How to Repair a Locket Hinge: passo 9, immagine 2 di 2
    • The final product, the locket hinge is fixed and the locket can be used.

Linea Traguardo

Daisy J Williams

Membro da: 01/31/24

169 Reputazione

1 Guida realizzata

Team

UC Davis, Team 4-3, Andersen Winter 2024 Membro di UC Davis, Team 4-3, Andersen Winter 2024

UCD-ANDERSEN-W24S4G3

3 Membri

1 Guida realizzata

0 Commenti

Aggiungi Commento

Visualizza Statistiche:

Ultime 24 Ore: 0

Ultimi 7 Giorni: 4

Ultimi 30 Giorni: 28

Tutti i Tempi: 101